Lesson 2
Scenes, Nodes, and Animating Sprites
Scenes and Nodes

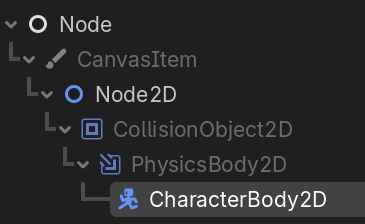
Nodes are the fundamental building blocks of your game. There are a lot of different types of nodes, such as Sprite2D, CollisionShape2D, AudioStreamPlayer. Each type of Node will have its own unique properties that can be edited. Different types of Nodes inherit other Nodes, meaning they inherit all of the properties from their parents. For example, a CharacterBody2D is a PhysicsBody2D, which is a CollisionObject2D, which is a Node2D. This means that a CharacterBody2D has all of the properties of a PhysicsBody2D, and a CollisionObject2D (such as collision layers), and a Node2D (such as a 2D position), as well as its own unique CharacterBody2D properties (such as up direction).
When you create a hierarchy of nodes to represent a specific asset in your game, that is called a Scene. You will create lots of different scenes for things like your player, NPCs, obstacles, collectables, environmental elements, etc. In order to use a Scene in another Scene, you instantiate it, or create a new instance of that scene. This new instance will have include all of the nodes and properties defined in the original scene.
Animationed Sprites
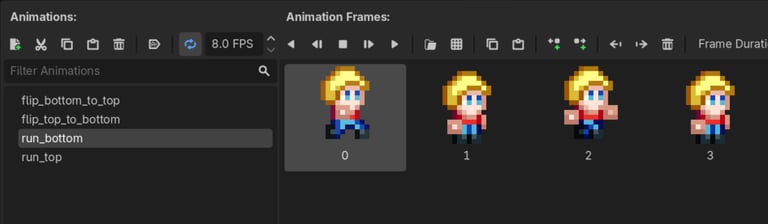
The most common way to create animations in a 2D game is by adding an AnimatedSprite2D node to your scene. This node type allows you to define multiple animations in its SpriteFrames property. Each animation has a unique name and a series of sprite frames that will be played. When you plan an animation, the AnimatedSprite2D node will automatically cycle through the sprites in the animation, drawing each one to the screen in order, creating the effect of an animation.
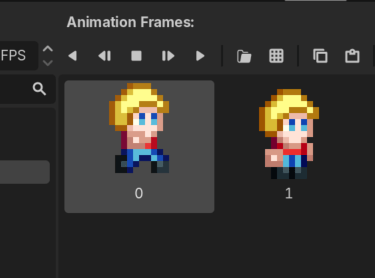
Animations automatically loop by default, which is really nice for things like running or idle animations, but sometimes you just want to play an animation once and then have it end. This would include things like jumping, taking damage, or dying. For animations that should not loop, simply select the animation and uncheck the "Animation Looping" button, next to the FPS box.
The most common way to control which animation is playing is through scripting, which we will get to in the next lesson. In a script, you can specify which animation (by name) you want playing, and you can play, stop, and control the speed of the animation. You can only specify one of the animations that you have defined in the SpriteFrames of the node.
Collision Shapes
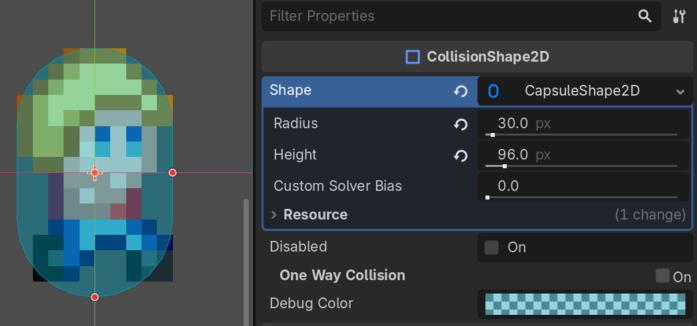
A Sprite2D or AnimatedSprite2D only defines what something looks like to the player, but in order for that object to interact with other nodes in the game, you need to give it a shape using the CollisionShape2D node. The collision shape will never appear to the player, it is simply there to tell the physics engine what area in the game this "thing" occupies so that the physics engine can determine when it collides or intersects other "things" in the game.
When you adda CollisionShape2D node to your scene, you then need to give it a shape. There are several built in shapes, such as Circles, Rectangles, and Capsules, and each shape can be edited to define its specific size and shape.
In order to be effective, the CollisionShape2D node must be added as a child to some sort of CollisionObject2D node type. As specified earlier, the CharacterBody2D node is a CollisionObject2D node. Other types of collision objects include Area2D, StaticBody2D, and RigidBody2D, which each serves a slightly different purpose. For example, a StaticBody2D is ideal for something that players can collide with or interact with, but which don't move.
You can create more complex shapes for a scene by adding multiple CollisionShape2D nodes to a CollisionObject2D parent, each with their own shapes. The physics engine will consider all shapes to be part of the same object and will respond to collisions and intersections for all of them the same way.
Homework
Create a new Godot project for your game.
Download the project resources and add them to your project.
Edit the Project/Project Settings
Resize Display/Window/Viewport to (1024, 768)
Change Display/Window/Stretch Mode to "canvas_items"
Change Rendering/Textures/Default Texture Filter to "Nearest"
Create player scene
Root node: CharacterBody2D (change name to "Player")
Add child node: AnimatedSprite2D
Add SpriteFrames
Add animations for "run_bottom", "run_top", "flip_bottom_to_top", and "flip_top_to_bottom"
Set FPS for animations to 8.0
Flipping animations should NOT loop
Scale node to (6.0, 6.0)
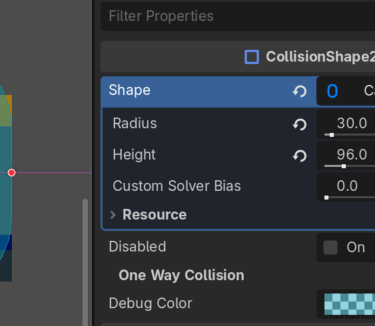
Add child node: CollisionShape2D
Add Capsule shape
Resize capsule to Radius: 30.0, Height: 96.0
Create main scene:
Root node type: Node (change name to "Main")
Add instance of Player scene as a child of root.
Set position to (134, 384)