Lesson 3
Physics, Input, and Scripting
Physics Layers
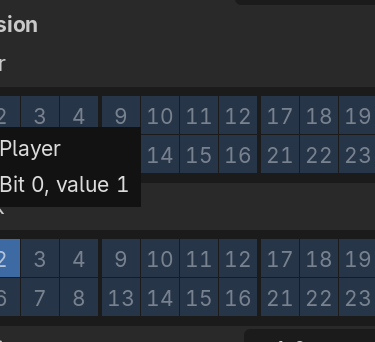
Physics layers are user-defined settings that can be used to control how CollisionObject2Ds interact with each other. You can define the physics layers in the Project Settings under General/Layer Names/2D Physics. Each CollisionObject2D node can be assigned one or more Collision Layer bits, defining it as a wall or an obstacle or whatever you want it to be. It can also have one or more Collision Mask bits, which define what other layers it scans for (i.e. what it can "detect"). Setting the right collision layers and masks is crucial, not only for collision detection (ex., making sure you player stops on the floor rather than passing through it), but also for handling things like item collection, taking damage from bullets, or allowing enemies to pass through each other while the player can stomp on them.
Scripting
There are a lot of different parts of a script that do different things. For the sake of keeping things simple, we'll just cover the most common/important here.
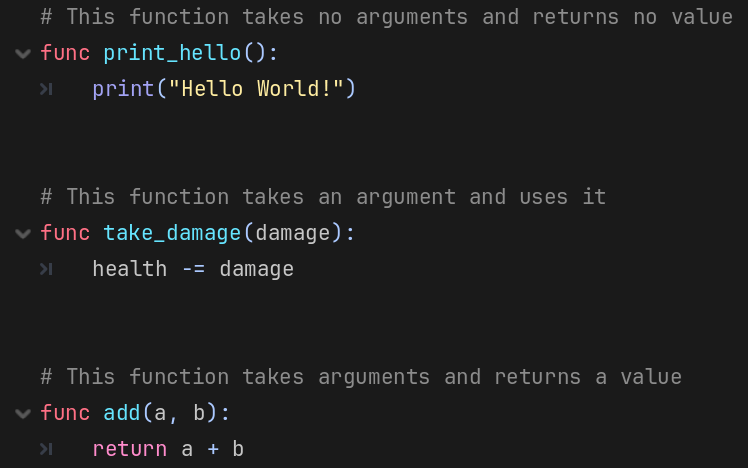
Functions: A function is a body of code that can be called to perform a series of operations. Functions have a name, which must be unique within a given script. They can also optionally take arguments, which are variables that get passed into the function so that the function can do something with them. They can also optionally return a value. In GDScript, a function is defined using the func keyword, followed by the function name. The function definition must end with a colon, :
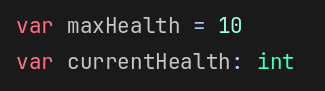

Variables: A variable is something that can hold a value. Variables have a type, such as int, float, String, or Node2D, which determines the types of values that variable can be assigned. In GDScript, variables are defined using the var keyword. Variable names can only contain uppercase letters (A-Z), lowercase letters (a-z), digits (0-9), and underscores (_), and they must start with a letter or underscore, not a number. Other special characters (ex, $, #, &, ...) and spaces are not allowed in variable names.
GDScript is a loosely typed language, meaning that a variable's type is determined by the value it gets assigned; you don't have to explicitly define the type. However, in many cases you may want to define the type in order to limit/enforce the values it can be assigned.
GDScript is an indentation-sensitive language, meaning that it determines what code is part of a function based on its indentation level. All code within a function is expected to be indented by the same level or more. There is no special character or keyword that is used to identify the end of the function; rather, the indentation level determines when the function ends.
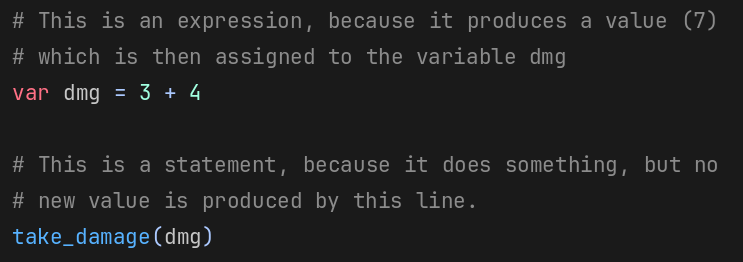
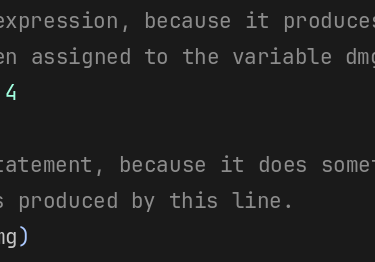
Statements and Expressions: A statement is a line of code that "does something", usually a function call. An expression is a line of code that evaluates something, or produces a value. Most of your code will be made up of statements and expressions, and while they technically mean different things, this is what most people think of when they say "code" and we will not be making a strong distinction between the two in this class.
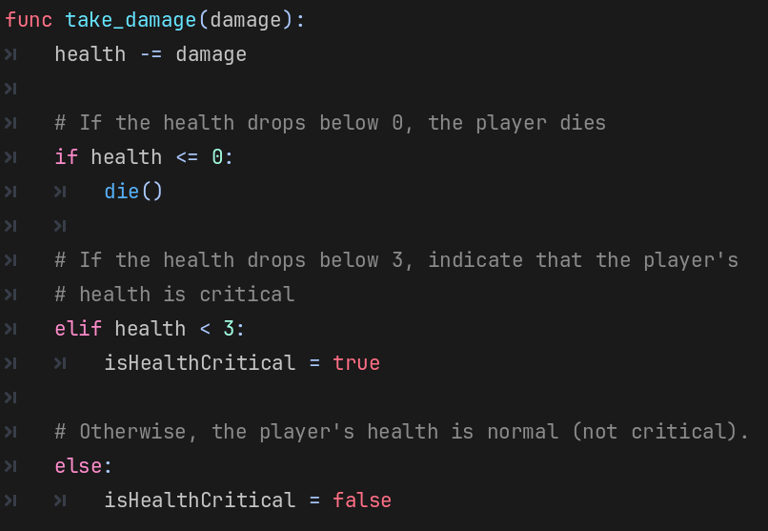
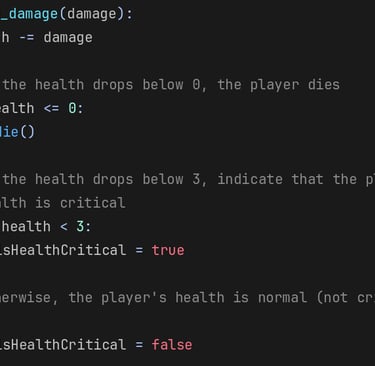
Conditional statements: A conditional statement (or simply "conditional") is a control construct that allows your code to "make decisions" and execute different blocks of code based on whether a certain condition evaluates to true or false. The keywords used for conditionals in GDScript are if, else, and elif (mean "else if"). Like with functions, the body of code to be executed if a condition is true is determined by its indentation level.
Input Mapping
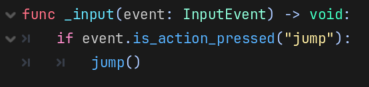
Your code should never check for specific keys or controller buttons, especially if you want to let the user remap input for different actions. Instead, Godot lets you define Input Actions and map what specific mouse, keyboard, and controller events can trigger those actions. This allows you to write code based on the "jump" action, or the "shoot" action being triggered, rather than check for the space key or left mouse button being pressed.
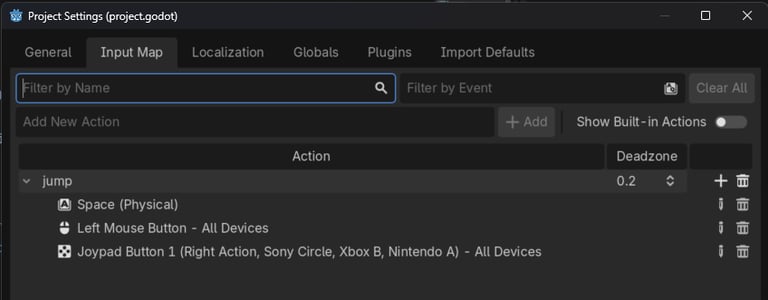
Then, in your code, you can check for specific named actions, regardless of what keys or buttons triggered them.


Download the week 3 project
Homework
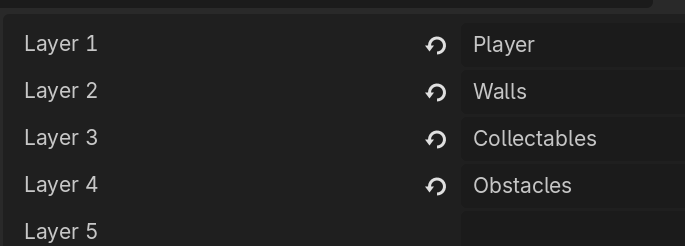
Define physics layers
Open Project/Project Settings
Find the physics layers under Layer Names/2D Physics
Add 4 layers:
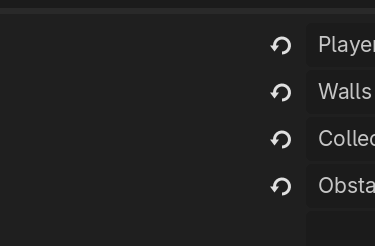
1. Player
2. Walls
3. Collectables
4. Obstacles
Update the Player scene
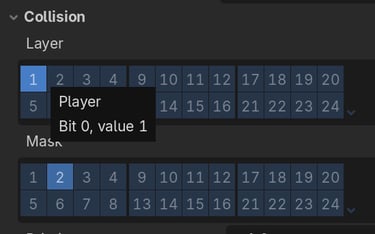
Set the player's collision layer to 1 (Player)
Set the player's collision mask to 2 (Walls)
Define input actions
Open Project/Project Settings
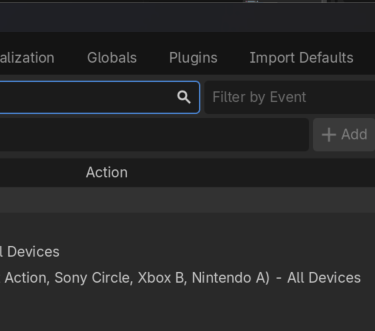
On the Input Map tab, add a new action called "jump"
Add whatever keyboard, mouse, or controller events you want to trigger the "jump" action.
Add walls
Add a StaticBody2D to the main scene
Rename to "Walls"
Set collision layer to 2 (Walls)
Remove collision masks
Add child CollisionShape2D:
Rename to "Top"
Set shape to RectangleShape
Set size to (1190, 106)
Set position to (512, 43)
Duplicate the "Top" node to add a second CollisionShape2D with the same properties
Rename to "Bottom"
Change position to (512, 725)
If desired, add ColorRects to the Walls node to provide a visual representation of the walls.
Add Player script
Add a script to the root node of the Player scene, called player.gd
Add code for:
Falling: Update velocity each frame, call move_and_slide(). Remember to take "delta" time into consideration when updating velocity, which is how much time has passed since the last frame.
Jumping: Respond to the "jump" action being pressed by changing the direction of gravity
Animations: Play the "run_bottom" or "run_top" animations when on ceiling or on floor, play the "flip_top_to_bottom" or "flip_bottom_to_top" animations when jumping, depending on the gravity direction.
Download completed player.gd script if necessary.
(Don't just add player.gd script to your project, actually copy it by hand so you get the experience writing the code yourself)