Lesson 4
Signals and Background Scrolling
Parallax Nodes

Download the week 4 project
A parallax effect means that objects further away from your point of view appear to move more slowly. You have seen this when riding in a car. Telephone poles and street lamps appear to pass by very quickly, while buildings and trees appear to pass by more slowly. Very distant objects, like mountains or city skylines, appear to almost not move at all.
In a 2D game, using a parallax effect for your background is a great way to create a sense of depth since our eyes will naturally interpret the slower moving layers as being further away. Godot provides a Parallax2D node type to accomplish this. As the camera moves, the Parallax2D node will automatically scroll its children, and you can adjust the scroll speed so make different layers move at different speeds. For example, a foreground layer should move very quickly (maybe even the same speed as the camera), whereas a sky layer should move very slowly. If you do not use a camera, you can instead manually set the autoscroll speed of the Parallax2D node to cause it to automatically move its children as some fixed speed.
Godot has an excellent tutorial with more details on how to use the Parallax2D node in your game.
Procedural Tiling
In video games, procedural generation means that something is generated at runtime with some amount of randomness, so it comes out different each time. A few examples of procedurally generated games would be Minecraft, No Man's Sky, and Subway Surfers. It's a way of creating infinite variety so that you don't have to manually design every possible level.
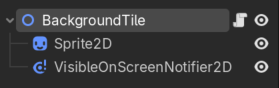
We can use procedural generation to create the background for our game by creating a few pre-defined background tiles, and then using a script to randomly chose background tiles to add to the scene as the player is running. Each background tile needs to have 3 components:
A Spirte2D: Obviously, this will be the visual representation of the background tile. The only important detail here is that every sprite must have left and right edges that seamlessly tile with all other background sprites, so that no matter what sprite they are displayed next to, it looks like they go together.
A VisibleOnScreenNotifier2D: This is a new node type that has a rectangle shape you can configure, and it emits signals when whenever that shape enters or exits the screen. It is incredibly useful for triggering things to happen in a script when a node enters or exits the screen.
A script that forwards the signals from the VisibleOnScreenNotifier2D child node to other nodes. This isn't strictly necessary, but it makes using the background tile scenes more clean since other nodes don't need to directly access its children.

Signals
A signal is a special type of variant that allows you to connect callables (i.e., functions) to them in order to listen and react to certain events. Whenever something happens that causes a signal to be emitted, all of the connected callables will be called. Some common use cases for signals include:
UI events: Whenever the user clicks a button, or changes the value on a slider, they will emit the appropriate signal so that your script can respond to the event.
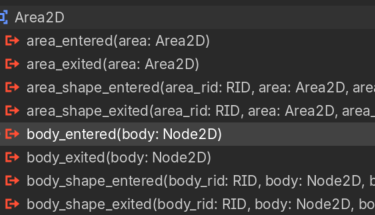
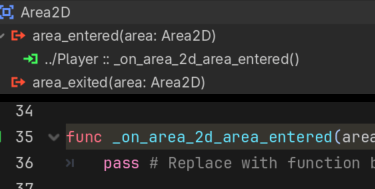
Collision detection: The Area2D node will emit signals when another Area2D or PhysicsBody2D intersects them. This can be useful for item collection or damage detection.
State changes: If the player's state changes, (ex, going from "alive" to "dead"), it can be useful to emit a signal to let other game objects know.
You can find all of the signals that a node can emit under the Signals tab of the Inspector window:

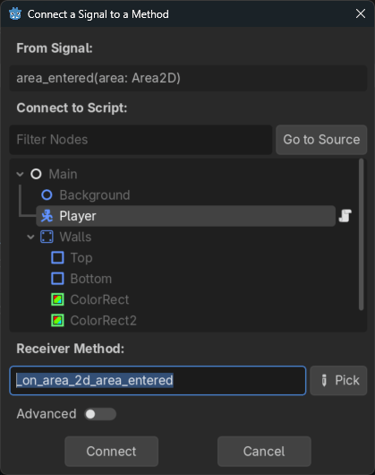
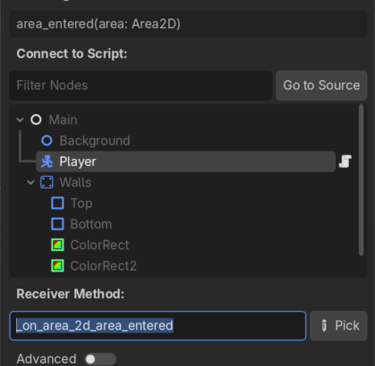
There are two ways to connect a function to a signal. The first is through the inspector. Double-click on a signal to open the "Connect a Signal to a Method" dialog. In this dialog you can enter a method name to connect to (usually the default is sufficient), and a node in the current scene that this method will be added to. The signal will automatically be connected to the specified method, as indicated by the "connected" icon in both the signals tab, and in the script.
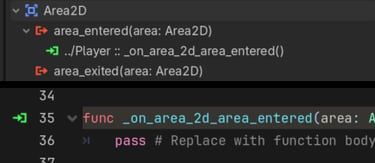
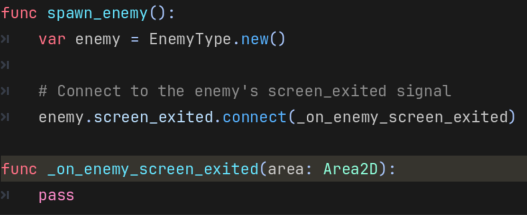
The second way to connect a method to a signal is manually in code. This approach is necessary when instantiating new game objects at runtime, such as spawning new enemies or obstacles, but can also be useful in other situations as well. When manually connecting a method to a signal, you pass the method name, but without the parenthesis or arguments. You are not calling the method, rather you are passing the method as an argument to the signal so that it can be called later.

Homework
Download the new resources for the background (optional, you can also create/obtain your own)
Add Scrolling Background (Method 1: Parallax)
NOTE: If you use this technique, make sure you add a layer for both the floor and ceiling that the player can run on!
Create a new scene with a Node2D root node, save it as background.tscn.
Add a Parallax2D child node, rename it SkyLayer.
Add a Sprite2D child node.
Add the sprite you want to use for the sky.
Adjust the scale and position of the Sprite2D node until it fills the screen.
Adjust the Repeat Times of the parallax node, depending on the size of your sprite (1-3)
Adjust the Repeat Size of the parallax node so that the repeating instances of the sprite aligns with each other.
In the Override section, check Ignore Camera Scroll.
Set the Autoscroll speed to (-100, 0) (or whatever appropriate speed you want)
Add additional Parallax2D nodes for additional background layer (tress, plains, foreground, etc.) with different Autoscroll speeds.
Add background scene to your main scene.
Add Scrolling Background (Method 2: Procedural Tiling)
Create a new scene with a Node2D root node, save it as background_tile1.tscn.
Add a Sprite2D child node.
Select a background tile as the texture.
Adjust the scale as necessary so it fills the entire screen vertically.
Adjust the position to (width/2, height/2) so that the top-left corner is at the origin (0, 0)
Add a VisibleOnScreenNotifier2D child node.
Adjust the size and position so that it exactly overlaps your sprite
Attach the BackgroundTile script to the root node.
Duplicate the background tile scene for any additional tiles you want to create.
Be sure the VisibleOnScreenNotifier2D node for each one exactly overlaps the sprite.
Create a new scene with a Node2D root node, save it as background.tscn.
Add enough instances of your background tile scenes to fill the screen.
Attach the background_spawner script to the root node.
In the Inspector, add elements to the Tile Prefabs array and add all of your background tile scenes.
Adjust the Speed as necessary to suit your preference.
NOTE: You could use a combination of both the parallax and tiling background methods if your background tiles have transparency to them. For example, you could be running down a hallway with windows that allows you to see the landscape in the background.